_YOUR_MQX_INSTALLATION_PATH_\config\_YOUR_TOWER_KIT_\cw10
where _YOUR_MQX_INSTALLATION_PATH_ is the location where you installed MQX 4.0 and _YOUR_TOWER_KIT_ is your Tower Kit's name.
For example, to build the libraries for a TWRK60N512, the path would be “C:\Freescale\Freescale_MQX_4_0\config\twrk60n512\cw10” assuming the default MQX 4.0 installation path.
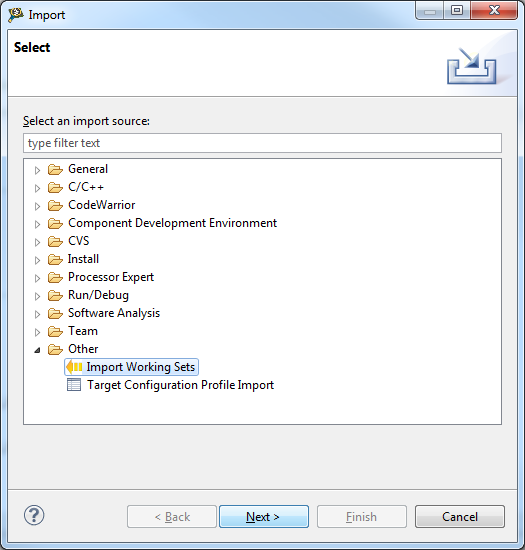
Select the .wsd file that you will find in this path (for example, twrk60n512.wsd).
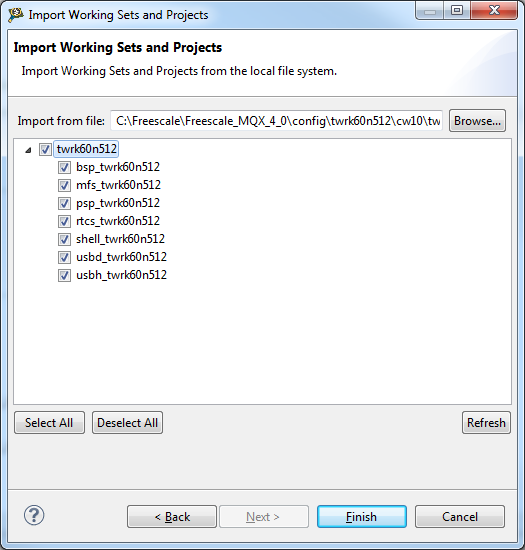
Click the Finish button; the import process will begin. The import process may take a while to complete, please be patient.
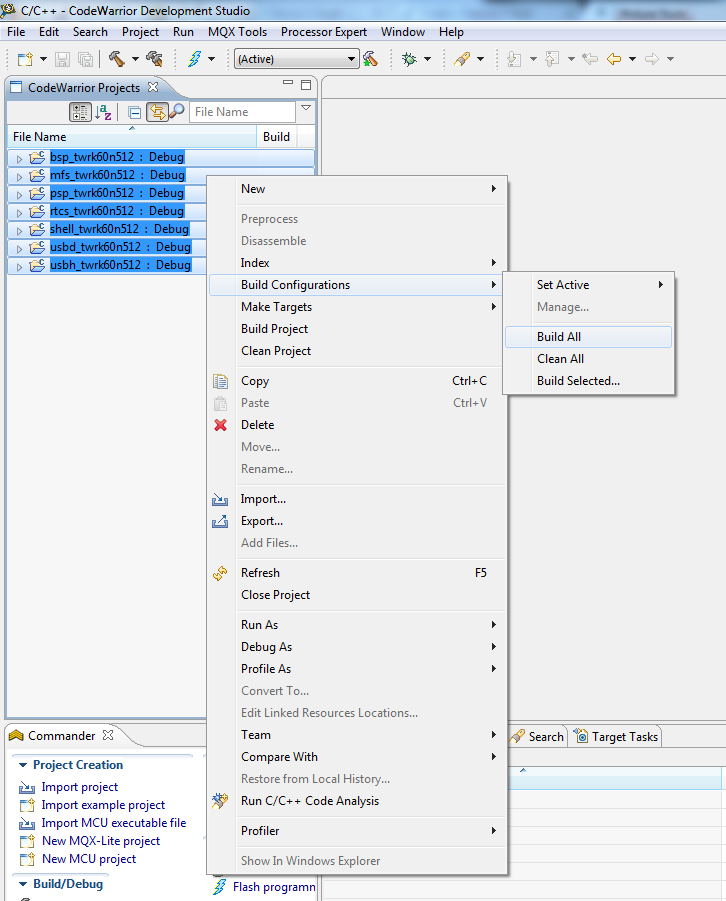
Optionally, before proceeding to build all configurations, you might want to modify the BSP and PSP’s user_config.h header file.
For example, to support the full Firmware Update feature in TWRK60N512 you have to modify the following line:#define BSPCFG_ENABLE_FLASHX 0
Replacing it with the following:#define BSPCFG_ENABLE_FLASHX 1
Also, you can change other MQX parameters within this file, such as the default I/O Channel for the Serial Console:#define BSP_DEFAULT_IO_CHANNEL "ttyd:"
The above line will configure the BSP of TWRK60N512 to use the DB9 connector in TWR-SER instead of the default USB Serial Port. For TWRK53N512 the TWR-SER is also "ttyd:" and for TWRK70F120M it is "ttyc:".

|
It is recommended thta you configure the default IO channel to be the TWR-SER DB9 connector. |