
Dynamic C comes with a FAT (File Allocation Table) file system. The small footprint of this well-defined industry-standard file system makes it ideal for embedded systems. The Dynamic C implementation of FAT has a directory structure that can be accessed with either Unix or DOS style paths. The standard directory structure allows monitoring, logging, Web browsing, and FTP updates of files.
The Dynamic C implementation of FAT supports both SPI-based serial flash devices and NAND flash devices. FAT version 2.13 adds support for SD cards and requires Dynamic C 10.21 or later. In all versions of the FAT, a battery-backed write-back cache reduces wear on the flash device and a round-robin cluster assignment helps spread the wear over its surface.
Please be sure check the Rabbit website for software patches and updates to Dynamic C, the FAT filessytem, and for your specific hardware:
www.rabbit.com/support/downloads/
The FAT library can be used in either blocking or non-blocking mode and supports both FAT12i and FAT16. (See Section 12.5.3.1 for more information on these FAT types.)
Operations performed by the Dynamic C FAT implementation are:
Formatting and partitioning of devices
Formatting partitions
File operations: create, open, close, delete, seek, read and write
Directoryii operations: create, read and delete
Labels: create and delete
Let’s define some terms before continuing.
A device is a single physical hardware item such as a hard drive, a serial flash or a NAND flash. E.g., one serial flash is a single device. The device, in turn, can host one to four partitions.
A partition is a range of logical sectors on a device. A real-world example of a partition is what is commonly known as the C drive on a PC.
Blocking is a term that describes a function’s behavior in regards to completion of the requested task. A blocking function will not return until it has completely finished its task. In contrast, a non-blocking function will return to its calling function before the task is finished if it is waiting for something. A non-blocking function can return a code that indicates it is not finished and should be called again. Used in conjunction with cooperative multitasking, non-blocking functions allow other processes to proceed while waiting for hardware resources to finish or become available.
A driver is the software interface that handles the hardware-specific aspects of any communication to or from the device.
A sample program is reviewed in Section 12.2. Two additional sample programs, one for use with the blocking mode of the FAT and the other for use with the non-blocking mode are described in Section 12.3. Then Section 12.4 gives detailed descriptions of the various FAT file system functions (formatting, opening, reading, writing, and closing). Short, focused examples accompany each description. There is some general information about FAT file systems and also some web links for further study in Section 12.5.
NOTE: All error codes returned from the Dynamic C FAT file system are defined in \Lib\Rabbit4000\ERRNO.LIB.
To run FAT samples, you need a Rabbit-based board with a supported flash type, such as the serial flash device available on the RCM4200 and 4210. FAT version 2.13 requires Dynamic C 10.21 or later and adds support for SD cards, which are available on the RCM4300 and 4310.
The board must be powered up and connected to a serial port on your PC through the programming cable to download a sample program.
In this section we look at fat_create.c, which demonstrate the basic use of the FAT file system. If you are using a serial or NAND flash device that has not been formatted or a removable device that was not formatted using Dynamic C, you must run Samples\FileSystem\Fmt_Device.c before you can run any other sample FAT program. The program, Fmt_Device.c, creates the default configuration of one partition that takes up the entire device.
If you are using an SD card, run Fmt_Device.c to remove the factory FAT32 partition and create a FAT16 partition. Be aware that although multiple partitions are possible on removable cards, most PC’s will not support cards formatted in this fashion.
If you are using a removable NAND flash (XD cards), running Fmt_Device.c causes the device to no longer be usable without the Rabbit-based board or the Rabbit USB Reader for XD cards. Insert the NAND flash device into a USB-based flash card reader and format it to regain this usability. Note that this will only work if you have not defined the macro NFLASH_CANERASEBADBLOCKS. Defining this macro in a running application destroys proprietary information on the first block of the device, making it difficult to regain the usability of the NAND device when used without the Rabbit-based board.
If you are using FAT version 2.01 or later, you do not have to run Fmt_Device.c if you initialize the FAT file system with a call to fat_AutoMount() instead of fat_Init(). The function fat_AutoMount() can optionally format the device if it is unformatted; however, fat_AutoMount() will not erase and overwrite a factory-formatted removable device such as an SD card. If you are using an SD card, run Fmt_Device.c or erase the first three pages with the appropriate flash utitity (sdflash_inspect.c or nflash_inspect.c).
After the device has been formatted, open Samples\FileSystem\fat_create.c. Compile and run the program by pressing function key F9.
In a nutshell, fat_create.c initializes FAT, then creates a file, writes “Hello world!” to it, and then closes the file. The file is re-opened and the file is read, which displays “Hello world!” in the Dynamic C Stdio window. Understanding this sample will make writing your own FAT application easier.
The sample program has been broken into two functional parts for the purpose of discussion. The first part deals with getting the file system up and running. The second part is a description of writing and reading files.
We will look at the first part of the code as a whole, and then explain some of its details.
File Name: Samples\FileSystem\fat_create.c
|
#define FAT_BLOCK // use blocking mode FATfile my_file; // get file handle int main(){ rc = fat_AutoMount( FDDF_USE_DEFAULT ); first_part = NULL; if (first_part == NULL) { // Check if mounted partition was found if (rc < 0){ // negative values indicate error |
#define FAT_BLOCK
#use "fat.lib"
cause the FAT library to be used in blocking mode.
The configuration library fat.lib chooses initialization settings based on the board type.The statement #use “fat.lib” brings in this configuration library, which in turn brings in the appropriate device driver library. The following table lists the device drivers that are available in the different FAT versions.
|
FAT Version |
Available Device Drivers |
|
2.12 |
sflash_fat.lib |
|
2.13 |
sflash_fat.lib |
Defining the macro _DRIVER_CUSTOM notifies fat_config.lib that a custom driver or hardware configuration is being used. For more information on how this works, see Section 12.5
Next some static variables are declared: a file structure to be used as a handle to the file that will be created and a buffer that will be used for reading and writing the file.
Now we are in main(). First there are some variable declarations: the integer rc is for the code returned by the FAT API functions. This code should always be checked, and must be checked if the non-blocking mode of the FAT is used. The descriptions for each function list possible return codes.
The variable prealloc stores the number of bytes to reserve on the device for use by a specific file. These clusters are attached to the file and are not available for use by any other files. This has some advantages and disadvantages. The obvious disadvantage is that it uses up space on the device. Some advantages are that having space reserved means that a log file, for instance, could have a portion of the drive set aside for its use only. Another advantage is that if you are transferring a known amount of information to a file, pre-allocation not only sets aside the space so you know you will not get half way through and run out, but it also makes the writing process a little faster as the allocation of clusters has already been dealt with so there is no need to spend time getting another cluster.
This feature should be used with care as pre-allocated clusters do not show up on directory listings until data is actually written to them, even though they have locked up space on the device. The only way to get unused pre-allocated clusters back is to delete the file to which they are attached, or use the fat_truncate() or fat_split() functions to trim or split the file. In the case of fat_split(), the pre-allocated space is not freed, but rather attached to the new file created in the split.
Lastly, a pointer to a partition structure is declared with the statement:
fat_part *first_part;
This pointer will be used as a handle to an active partition. (The fat_part structure and other data structures needed by the FAT file system are discussed in fat_AutoMount().) The partition pointer will be passed to API functions, such as fat_open().
Now a call is made to fat_AutoMount(). This function was introduced in FAT version 2.01 as a replacement for fat_Init(). Whereas fat_Init() can do all the things necessary to ready the first partition on the first device for use, it is limited to that. The function fat_AutoMount() is more flexible because it uses data from the configuration file fat_config.lib to identify FAT partitions and to optionally ready them for use, depending on the flags parameter that is passed to it. The flags parameter is described in the function description for fat_AutoMount().
For this sample program, we are interested in the first usable FAT partition. The for loop after the call to fat_AutoMount() finds the partition, if one is available.
The for loop allows us to check every possible partition by using num_fat_devices, which is the number of configured devices, and then multiplying the configured devices by the maximum number of allowable partitions on a device, which is four. The for loop also makes use of fat_part_mounted, an array of pointers to partition structures that is populated by the fat_autoMount() call.
The rest of fat_create.c demonstrates how to use the file system once it is up and running.
File Name: Samples\FileSystem\fat_create.c
|
prealloc = 0; rc = fat_Open( first_part, "HELLO.TXT", FAT_FILE, FAT_CREATE, &my_file, &prealloc ); if (rc < 0) { if (rc < 0) { rc = fat_Open( first_part, "HELLO.TXT",FAT_FILE, 0, &my_file, NULL); if (rc < 0) { |
The call to fat_Open() creates a file in the root directory and names it HELLO.TXT. A file must be opened before you can write or read it.
rc = fat_Open(first_part, "HELLO.TXT", FAT_FILE, FAT_CREATE, &my_file, &prealloc);
The parameters are as follows:
first_part points to the partition structure initialized by fat_AutoMount().
"HELLO.TXT" is the file name, and is always an absolute path name relative to the root directory. All paths in Dynamic C must specify the full directory path explicitly.
FAT_FILE identifies the type of object, in this case a file. Use FAT_DIR to open a directory.
FAT_CREATE creates the file if it does not exist. If the file does exist, it will be opened, and the position pointer will be set to the start of the file. If you write to the file without moving the position pointer, you will overwrite existing data.
Use FAT_OPEN instead of FAT_CREATE if the file or directory should already exist. If the file does not exist, you will get an -ENOENT error.
Use FAT_MUST_CREATE if you know the file does not exist. This is a fail-safe way to avoid opening and overwriting an existing file since an -EEXIST error is returned if you attempt to create a file that already exists.
&my_file is a file handle that points to an available file structure. It will be used for this file until the file is closed.
&prealloc points to the number of bytes to allocate for the file. You do not want to pre-allocate any more than the minimum number of bytes necessary for storage, and so prealloc was set to 0. You could also use NULL instead of prealloc and prealloc = 0.
Next, the sample program writes the data "Hello, world!\r\n" to the file.
fat_Write( &my_file, "Hello, world!\r\n", 15 );
The parameters are as follows:
&my_file is a pointer to the file handle opened by fat_Open().
“Hello, world!\r\n” is the data written to the file. Note that \r\n (carriage return, line feed) appears at the end of the string in the call. This is essentially a FAT (or really, DOS) convention for text files. It is good practice to use the standard line-end conventions. (If you just use \n, the file will read just fine on Unix systems, but some DOS-based programs may have difficulties.)
15 is the number of characters to write. Be sure to select this number with care since a value that is too small will result in your data being truncated, and a value that is too large will append any data that already exists beyond your new data.
The file is closed to release the file handle to allow it to be used to identify a different file.
rc = fat_Close( &my_file );
The parameter &my_file is a handle to the file to be closed. Remember to check for any return code from fat_Close() since an error return code may indicate the loss of data.
The file must be opened for any further work, even though &my_file may still reference the desired file. The file must be open to be active, so we call fat_Open() again. Now the file can be read.
rc = fat_Read( &my_file, buf, sizeof(buf));
The function fat_Read() returns the number of characters actually read. The parameters are as follows:
&my_file is a handle to the file to be read.
buf is a buffer for reading/writing the file that was defined at the beginning of the program.
sizeof(buf) is the number of bytes to be read into buf. It does not have to be the full size of the buffer
Characters are read beginning at the current position of the file. (The file position can be changed with the fat_Seek() function.) If the file contains fewer than sizeof(buf) characters from the current position to the end-of-file marker (EOF), the transfer will stop at the EOF. If the file position is already at EOF, 0 is returned. The maximum number of characters read is 32767 bytes per call.
The file can now be closed. Call fat_UnmountDevice()iii rather than simply calling fat_Close() to ensure that any data stored in cache will be written to the device. With a write-back cache, writes are delayed until either:
all cache buffers are full and a new FAT read request requires a “dirty” cache buffer to be written out before the read can take place, or
cache buffers for a partition or a device are being flushed due to an unmount call or explicit flush call.
Calling fat_UnmountDevice() will close all open files and unmount all mounted FAT partitions. This is the safest way to shut down a device. The parameter first_part->dev is a handle to the device to be unmounted.
fat_UnmountDevice( first_part->dev );
NOTE: A removable device must be unmounted in order to flush its data before removal. Failure to unmount any partition on a device that has been written to could corrupt the file system.
This section studies blocking sample FAT_SHELL.C and non-blocking sample FAT_NB_Costate.c More sample programs are in the Dynamic C folder Samples\FileSystem\FAT. For example, there is udppages.c, an application that shows how to combine HTTP, FTP and zserver functionality to create web content than can be updated via FTP.
As described in Section 12.2, you will need a target board or core module with a supported flash device, powered up and connected to a serial port on your PC through the programming cable.
The sample program Samples\FileSystem\FAT_SHELL.C allows you to use the FAT library by entering DOS-like or Unix-like commands. To run this sample, open Dynamic C, then open FAT_SHELL.C. Compile and run FAT_SHELL.C by pressing F9. If the flash device has not been formatted and partitioned, FAT_SHELL.C will format and partition the flash device, and then you will be prompted to run FAT_SHELL.C again (just press F9 when prompted). A display similar to the one shown in Figure 1 will open in the Dynamic C Stdio window.
Optional parameters are denoted by the square braces [ and ] following the command name. The [alc] after “touch” and “mtouch” indicates an optional allocation amount in bytes. The square braces in the description indicate the default value that will be used if the optional parameter is not given.
Figure 1. List of Shell Commands
You can type “h” and press enter at any time to display the FAT shell commands.
In the following examples the commands that you enter are shown in boldface type. The response from the shell program is shown in regular typeface.
|
> ls |
This shows the HELLO.TXT file that was created using the FAT_CREATE.C sample program. The file length is 15 bytes. Cluster 2 has been allocated for this file. The “ls” command will display up to the first six clusters allocated to a file.
The flag, rhsvdA, displays the file or directory attributes, with upper case indicating that the attribute is turned on and lower case indicating that the attribute is turned off. In this example, the archive bit is turned on and all other attributes are turned off.
These are the six attributes:
|
r - read-only |
v - volume label |
|
h - hidden file |
d - directory |
|
s - system |
a - archive |
To create a directory named DIR1, do the following:
|
> mkdir dir1 |
This shows that DIR1 was created, and is 1024 bytes (size may vary by flash type).
Now, select DIR1:
|
> cd dir1 |
Add a new file called RABBIT.TXT:
|
> touch rabbit.txt |
Note that the file name was appended to the current directory. Now we can write to RABBIT.TXT. The shell program has predetermined characters to write, and does not allow you to enter your own data.
|
> wr rabbit.txt |
To see what was written, use the “rd” command.
|
> rd rabbit.txt rabbit.txt 1024 The quick brown fox jumps over the lazy dog |
To use the FAT file system in non-blocking mode, do not include the statement #define FAT_BLOCK in your application. The program interface to the library is the same as the blocking version, with the exception of the return code -EBUSY from many of the API functions.
The sample program Fat_NB_Costate.c in the Samples\FileSystem folder is an example of a non-blocking application. To view the code in its entirety, open it in Dynamic C. The following discussion will not examine every line of code, but will focus on what shows the non-blocking nature of the FAT library and how the application takes advantage of it.
Run Fat_NB_Costate.c and after 10 seconds the Stdio window will show something similar to the following:
Figure 2. Screen Shot of Fat_NB_Costate.c Running
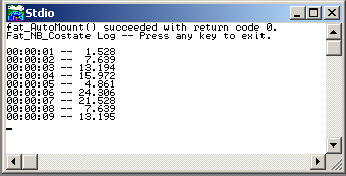
Each line is an entry into a file that is stored in the FAT file system. The file is appended once every second and read and displayed once every ten seconds. In addition to the file system use and the screen output, if you are using an RCM3300, RCM3700 or PowerCore FLEX development board, the application blinks the LED on your board.
The code preceding main() brings in the required library and declares the file structure. And, as expected, there is no #define for the macro FAT_BLOCK. At the start of main() some system variable are created and initialized. This is followed by the code to bring up the FAT file system, which is similar to what we examined in Section 12.2.1 when looking at fat_create.c, with two essential differences. One, since we have initialized the FAT to be in non-blocking and we are making some calls to FAT functions that must return before we can continue, we must wait for the return.
A while loop accomplishes our goal of blocking on the function call until it returns something other than busy.
while ((rc = fat_Open( first_part, name, FAT_FILE, FAT_MUST_CREATE, &file, &alloc)) == -EBUSY);
The second difference from our earlier sample is the statement right before fat_Open():
file.state = 0;
This is required before opening a file when using non-blocking mode in order to indicate that the file is not in use. Only do this once. After you have opened the file, do not alter the contents of the file structure.
If fat_Open() succeeds we can go into the non-blocking section of the program: three costatements inside an endless while loop. The benefit of using the non-blocking mode of the FAT file system is realized when using costatements, an extension of Dynamic C that implements cooperative multitasking. Instead of waiting while a function finishes its execution, the application can accomplish other tasks.
The first costate is named putdata. It waits for one second and then creates a string to timestamp the entry of a randomly generated number that is then appended to a file.
|
while (1){ |
Note that the always_on keyword is used. This is required when using a named costatement to force it to execute every time it is encountered in the execution thread (unless it is made inactive by a call to CoPause()).
It is easy to suspend execution within a costate by using the waitfor keyword. The costate will relinquish control if the argument to waitfor (in this case a call to DelaySec()) evaluates to FALSE. The next time the execution thread reaches putdata, waitfor will be called again. This will go on until DelaySec() returns TRUE, i.e., when one second has elapsed from the time DelaySec() was first called from within waitfor.
After the one second delay, the string to write to the file is placed in a buffer and a looping variable and position pointer are initialized.
|
sprintf(obuf, "%02d:%02d:%02d -- %6.3f \n", h, m, s, (25.0 * rand())); |
Before the buffer contents can be written to a file in the FAT file system, we must ensure that no collisions occur since there is another costate that will attempt to read the file every ten seconds. A file can not be read from and written to at the same time. In the following code the waitfor keyword is used with the global variable filestate (defined at the top of the application) to implement a locking mechanism. As soon as the file becomes available for putdata, it is marked unavailable for showdata.
|
waitfor (filestate == 0); // Wait until file is available |
The next block of code appends the latest entry into the file that was opened at the start of the application.
|
while (ocount < REC_LEN){ // Loop until entire record is written |
Again, waitfor is used to voluntarily relinquish control, this time while waiting for the write function to complete. If an error occurs during the write operation the device is unmounted and the application exits. Otherwise the loop counter and the buffer position pointer are advanced by the number of bytes actually written. Since this can be less than the requested number of bytes, it is best to check in a loop such as the while loop shown in putdata.
The last action taken by putdata is to reset filestate, indicating that the open file is available.
The costatement named showdata waits for ten seconds. Then it waits for the open file to be available, and when it is, immediately marks it as unavailable.
|
costate showdata always_on{ |
The next statement modifies the internal file position pointer. The first time this costate runs, readto is zero, meaning the position pointer is at the first byte of the file. The variable readto is incremented every time a record is read from the file, allowing showdata to always know where to seek to next.
|
waitfor (fat_Seek(&file, readto, SEEK_SET) != -EBUSY); |
The rest of showdata is a while loop inside of a while loop. The inner while loop is where each record is read from the file into the buffer and then displayed in the Stdio window with the printf() call. Since fat_Read() may return less than the requested number of bytes, the while loop is needed to make sure that the function will be called repeatedly until all bytes have been read. When the full record has been read, it will then be displayed to the Stdio window.
The outer while loop controls when to stop reading records from the file. After the last record is read, the fat_Read() function is called once more, returning an end-of-file error. This causes the if statements that are checking for this error to return TRUE, which resets filestate to zero, breaking out of the outer while loop and freeing the lock for the putdata costatement to use.
|
while (filestate){ |
The other costatement in the endless while loop is the one that blinks the LED. It illustrates that while using the file system in non-blocking mode, there is still plenty of time for other tasks.
The flash device must be formatted before its first use. Formatting it after its first use may destroy information previously placed on it.
As a convenience, Samples/FileSystem/Fmt_Device.c is provided to format the flash device. This program can format individual FAT 12/16 partitions, or can format all FAT 12/16 partitions found on a device. If no FAT 12/16 partitions are found, it offers the option of erasing the entire device and formatting it with a single FAT 16 partition. Be aware that this will destroy any data on the device, including that contained on FAT 32 partitions. This is an easy way to format new media that may contain an empty FAT32 partition spanning the entire device, such as a new SD or XD card.
After the device has been formatted with Fmt_Device.c, an application that wants to use the FAT file system just has to call the function fat_Init() (replaced in FAT version 2.01) or fat_AutoMount(). If you are calling fat_AutoMount() refer to Section 12.2.1 for an example of its use. Note that if you call fat_AutoMount() using the configuration flag FDDF_DEV_FORMAT, you may not need to run Fmt_Device.c.
To create multiple partitions on the flash device use the sample program FAT_Write_MBR.c, which will allow you to easily create as many as four partitions. This program does require that the device be “erased” before being run. This can be done with the appropriate sample program: sdflash_inspect.c, sflash_inspect.c or nflash_inspect.c. You only need to clear the first three pages on SD cards or serial flash, or the first page on NAND flash or XD cards. Once this is done, run FAT_Write_MBR and it will display the total size of the device in MegaBytes and allow you to specify the size of each partition until all the space is used. If you specify an amount larger than the space remaining, then all remaining space will be used for that partition. Once all space is specified, it will ask approval to write the new partition structure. This utility does not format the partitions, it merely creates their definitions. Run Fmt_device.c afterwards and use the 0 or 1 option to format the full device and all partitions will be formatted. Be forewarned that on removable media, using multiple partitions will typically make the device unusable with PC readers.
The sample program FAT_Write_MBR.c is distributed with FAT version 2.13. It is also compatible with FAT versions 2.01, 2.05 and 2.10. If you have one of these earlier versions of the FAT and would like a copy of FAT_Write_MBR.c, please contact Technical Support either by email to support@rabbitsemiconductor.com or by using the online form: www.rabbit.com/support/questionSubmit.shtml.
There is a way to create multiple partitions without using the utility FAT_Write_MBR.c; this auxiliary method is explained in Section 12.5.3.5.
If the flash device already has a valid partition that you want to keep, you must know where it is so you can fit the FAT partition onto the device. This requires searching the partition table for both available partitions and available space. An available partition has the partsecsize field of its mbr_part entry equal to zero.
Look in lib/.../RCM3300/RemoteApplicationUpdate/downloadmanager.lib for the function dlm_initserialflash() for an example of searching through the partition table for available partitions and space. See the next section for more information on the download manager (DLM) and how to set up coexisting partitions.
The RabbitCore RCM3300 comes with a download manager utility that creates a partition on a serial flash device, which is then used by the utility to remotely update an application. You can set up a device to have both a DLM partition and a FAT partition.
Run the program Samples/RCM3300/RemoteApplicationUpdate/DLM_FAT_FORMAT.C. This program must be run on an unformatted serial flash, i.e., a flash with no MBR. To remove an existing MBR, first run the program Samples/RCM3300/SerialFlash/SFLASH_INSPECT.C to clear the first three pages.
The program DLM_FAT_FORMAT.C will set aside space for the DLM partition and use the rest of the device to create a FAT partition. Then, when you run the DLM software, it will be able to find space for its partition and will coexist with the FAT partition. This shows the advantage to partitions: Partitions set hard boundaries on the allocation of space on a device, thus neither FAT nor the DLM software can take space from the other.
The Dynamic C FAT implementation supports the basic set of file and directory operations. Remember that a partition must be mounted before it can be used with any of the file, directory or status operations.
The fat_Open() function opens a file or a directory. It can also be used to create a file or a directory. When using the non-blocking FAT, check the return code and call it again with the same arguments until it returns something other than -EBUSY.
|
rc = fat_Open(my_part, "DIR\\FILE.TXT", FAT_FILE, FAT_CREATE, &my_file, &prealloc); |
The first parameter, my_part, points to a partition structure. This pointer must point to a mounted partition. Some of the sample programs, like fat_create.c, declare a local pointer and then search for a partition pointer in the global array fat_part_mounted[]. Other sample programs, like fat_shell.c, define an integer to be used as an index into fat_part_mounted[]. Both methods accomplish the same goal of gaining access to a partition pointer.
The second parameter contains the file name, including the directory (if applicable) relative to the root directory. All paths in Dynamic C must specify the full directory path explicitly, e.g., DIR1\\FILE.EXT or DIR1/FILE.EXT. The direction of the slash in the pathname is a backslash by default. If you use the default backslash for the path separator, you must always precede it with another backslash, as shown in the above call to fat_Open(). This is because the backslash is an escape character in a Dynamic C string. To use the forward slash as the path separator, define the macro FAT_USE_FORWARDSLASH in your application (or in FAT.LIB to make it the system default).
The third parameter determines whether a file or directory is opened (FAT_FILE or FAT_DIR).
The fourth parameter is a flag that limits fat_Open() to the action specified. FAT_CREATE creates the file (or directory) if it does not exist. If the file does exist, it will be opened, and the position pointer will be set to the start of the file. If you write to the file without moving the position pointer, you will overwrite existing data. Use FAT_MUST_CREATE if you know the file does not exist; this last option is also a fail-safe way to avoid opening and overwriting an existing file since an -EEXIST error message will be returned if you attempt to create a file that already exists.
The fifth parameter, &my_file, is an available file handle. After a file or directory is opened, its handle is used to identify it when using other API functions, so be wary of using local variables as your file handle.
The final parameter is an initial byte count if the object needs to be created. It is only used if the FAT_CREATE or FAT_MUST_CREATE flag is used and the file or directory does not already exist. The byte count is rounded up to the nearest whole number of clusters greater than or equal to 1. On return, the variable prealloc is updated to the number of bytes allocated. Pre-allocation is used to set aside space for a file, or to speed up writing a large amount of data as the space allocation is handled once.
Pass NULL as the final parameter to indicate that you are opening the file for reading or that a minimum number of bytes needs to be allocated to the file at this time. If the file does not exist and you pass NULL, the file will be created with the minimum one cluster allocation.
Once you are finished with the file, you must close it to release its handle so that it can be reused the next time a file is created or opened.
|
rc = fat_Close(&my_file); |
Remember to check the return code from fat_Close() since an error return code may indicate the loss of data. Once you are completely finished, call fat_UnmountDevice() to make sure any data stored in the cache is written to the flash device.
Use fat_Read() to read a file.
|
rc = fat_Read(&my_file, buf, sizeof(buf)); |
The first parameter, &my_file, is a pointer to the file handle already opened by fat_Open(). The parameter buf points to a buffer for reading the file. The sizeof(buf) parameter is the number of bytes to be read into the buffer. It does not have to be the full size of the buffer. If the file contains fewer than sizeof(buf) characters from the current position to the end-of-file marker (EOF), the transfer will stop at the EOF. If the file position is already at the EOF, 0 is returned. The maximum number of characters read is 32767 bytes per call.
The function returns the number of characters read or an error code. Characters are read beginning at the current position of the file. If you have just written to the file that is being read, the file position pointer will be where the write left off. If this is the end of the file and you want to read from the beginning of the file you must change the file position pointer. This can be done by closing the file and reopening it, thus moving the position pointer to the start of the file. Another way to change the position pointer is to use the fat_Seek() function. This function is explained in Section 12.4.2.3.
Use fat_ReadDir() to read a directory. This function is explained in Section 12.4.2.5.
Use fat_Write() or fat_xWrite() to write to a file. The difference between the two functions is that fat_xWrite() copies characters from a string stored in extended memory.
|
rc = fat_Write(&my_file, "Write data\r\n", 12); |
The first parameter, &my_file, is a pointer to the file handle already opened by fat_Open(). Because fat_Open() sets the position pointer to the start of the file, you will overwrite any data already in the file. You will need to call fat_Seek() if you want to start the write at a position other than the start of the file (see Section 12.4.2.3).
The second parameter contains the data to write to the file. Note that \r\n (carriage return, line feed) appear at the end of the string in the function. This is essentially a FAT (or really, DOS) convention for text files. It is good practice to use these standard line-end conventions. (If you only use \n, the file will read just fine on Unix systems, but some DOS-based programs may have difficulties.) The third parameter specifies the number of characters to write. Select this number with care since a value that is too small will result in your data being truncated, and a value that is too large will append any data that already exists beyond your new data.
Remember that once you are finished with a file you must close it to release its handle. You can call the fat_Close() function, or, if you are finished using the file system on a particular partition, call fat_UnmountPartition(), which will close any open files and then unmount the partition. If you are finished using the device, it is best to call fat_UnmountDevice(), which will close any open FAT files on the device and unmount all mounted FAT partitions. Unmounting the device is the safest method for shutting down after using the device.
The position pointer is at the start of the file when it is first opened. Two API functions, fat_Tell() and fat_Seek(), are available to help you with the position pointer.
|
fat_Tell(&my_file, &pos); |
The fat_Tell() function does not change the position pointer, but reads its value (which is the number of bytes from the beginning of the file) into the variable pointed to by &pos. Zero indicates that the position pointer is at the start of the file. The first parameter, &my_file, is the file handle already opened by fat_Open().
The fat_Seek() function changes the position pointer. Clusters are allocated to the file if necessary, but the position pointer will not go beyond the original end of file (EOF) unless doing a SEEK_RAW. In all other cases, extending the pointer past the original EOF will preallocate the space that would be needed to position the pointer as requested, but the pointer will be left at the original EOF and the file length will not be changed. If this occurs, the error code -EEOF is returned to indicate the space was allocated but the pointer was left at the EOF. If the position requires allocating more space than is available on the device, the error code -ENOSPC is returned.
The first parameter passed to fat_Seek() is the file handle that was passed to fat_Open(). The second parameter, pos, is a long integer that may be positive or negative. It is interpreted according to the value of the third parameter. The third parameter must be one of the following:
SEEK_SET - pos is the byte position to seek, where 0 is the first byte of the file. If pos is less than 0, the position pointer is set to 0 and no error code is returned. If pos is greater than the length of the file, the position pointer is set to EOF and error code -EEOF is returned.
SEEK_CUR - seek pos bytes from the current position. If pos is less than 0 the seek is towards the start of the file. If this goes past the start of the file, the position pointer is set to 0 and no error code is returned. If pos is greater than 0 the seek is towards EOF. If this goes past EOF the position pointer is set to EOF and error code -EEOF is returned.
SEEK_END - seek to pos bytes from the end of the file. That is, for a file that is x bytes long, the statement:
fat_Seek (&my_file, -1, SEEK_END);
will cause the position pointer to be set at x-1 no matter its value prior to the seek call. If the value of pos would move the position pointer past the start of the file, the position pointer is set to 0 (the start of the file) and no error code is returned. If pos is greater than or equal to 0, the position pointer is set to EOF and error code -EEOF is returned.
SEEK_RAW - is similar to SEEK_SET, but if pos goes beyond EOF, using SEEK_RAW will set the file length and the position pointer to pos. This adds whatever data exists on the allocated space onto the end of the file..
While the fat_Open() function is versatile enough to not only open a file but also create a file or a subdirectory, there are API functions specific to the tasks of creating files and subdirectories.
The fat_CreateDir() function is used to create a subdirectory one level at a time.
|
rc = fat_CreateDir(my_part, "DIR1"); |
The first parameter, my_part, points to a partition structure. This pointer must point to a mounted partition. Some of the sample programs, like fat_create.c, declare a local pointer and then search for a partition pointer in the global array fat_part_mounted[]. Other sample programs, like fat_shell.c, define an integer to be used as an index into fat_part_mounted[]. Both methods accomplish the same goal of gaining access to a partition pointer.
The second parameter contains the directory or subdirectory name relative to the root directory. If you are creating a subdirectory, the parent directory must already exist.
Once DIR1 is created as the parent directory, a subdirectory may be created, and so on.
|
rc = fat_CreateDir(my_part, "DIR1/SUBDIR"); |
Note that a forward slash is used in the pathname instead of a backslash. Either convention may be used. The backslash is used by default. To use a forward slash instead, define FAT_USE_FORWARDSLASH in your application or in FAT.LIB.
A file can be created using the fat_CreateFile() function. All directories in the path must already exist.
|
rc = fat_CreateFile(my_part, "DIR1/SUBDIR/FILE.TXT", &prealloc, |
The first parameter, my_part, points to the static partition structure set up by fat_AutoMount().
The second parameter contains the file name, including the directories (if applicable) relative to the root directory. All paths in the FAT library are specified relative to the root directory.
The third parameter indicates the initial number of bytes to pre-allocate. At least one cluster will be allocated. If there is not enough space beyond the first cluster for the requested allocation amount, the file will be allocated with whatever space is available on the partition, but no error code will be returned. If no clusters can be allocated, the -ENOSPC error code will return. Use NULL to indicate that no bytes need to be allocated for the file at this time. Remember that pre-allocating more than the minimum number of bytes necessary for storage will reduce the available space on the device.
The final parameter, &my_file, is a file handle that points to an available file structure. If NULL is entered, the file will be closed after it is created.
The fat_ReadDir() function reads the next directory entry from the specified directory. A directory entry can be a file, directory or a label. A directory is treated just like a file.
|
fat_ReadDir(&dir, &dirent, mode); |
The first parameter specifies the directory; &dir is an open file handle. A directory is opened by a call to fat_OpenDir() or by passing FAT_DIR in a call to fat_Open(). The second parameter, &dirent, is a pointer to a directory entry structure to fill in. The directory entry structure must be declared in your application, for example:
fat_dirent dirent;
Search Conditions
The last parameter, mode, determines which directory entry is being requested, a choice that is built from a combination of the macros described below. To understand the possible values for mode, the first thing to know is that a directory entry can be in one of three states: empty, active or deleted. This means you must choose one of the default flags described below, or one or more of the following macros:
FAT_INC_ACTIVE - include active entries. This is the default setting if other FAT_INC_* macros are not specified; i.e., active files are included unless FAT_INC_DELETED, FAT_INC_EMPTY, or FAT_INC_LNAME is set.
FAT_INC_DELETED - include deleted entries
FAT_INC_EMPTY - include empty entries
FAT_INC_LNAME - include long name entries (this is included for completeness, but is not used since long file names are not supported)
The above macros narrow the search to only those directory entries in the requested state. The search is then refined further by identifying particular attributes of the requested entry. This is done by choosing one or more of the following macros:
FATATTR_READ_ONLY - include read-only entries
FATATTR_HIDDEN - include hidden entries
FATATTR_SYSTEM - include system entries
FATATTR_VOLUME_ID - include label entries
FATATTR_DIRECTORY - include directory entries
FATATTR_ARCHIVE - include modified entries
Including a FATATTR_* macro means you do not care whether the corresponding attribute is turned on or off. Not including a FATATTR_* macro means you only want an entry with that particular attribute turned off. Note that the FAT system sets the archive bit on all new files as well as those written to, so including FATATTR_ARCHIVE in your mode setting is a good idea.
For example, if mode is (FAT_INC_ACTIVE) then the next directory entry that has all of its attributes turned off will be selected; i.e., an entry that is not read only, not hidden, not a system file, not a directory or a label, and not archived. In other words, the next writable file that is not hidden, system or already archived is selected.
But, if you want the next active file and do not care about the file’s other attributes, mode should be (FAT_INC_ACTIVE | FATATTR_READ_ONLY | FATATTR_HIDDEN | FATATTR_SYSTEM | FATATTR_ARCHIVE). This search would only exclude directory and label entries.
Now suppose you want only the next active read-only file, leaving out hidden or system files. The next group of macros allows this search by filtering on whether the requested attribute is set. The filter macros are:
FAT_FIL_RD_ONLY - filter on read-only attribute
FAT_FIL_HIDDEN - filter on hidden attribute
FAT_FIL_SYSTEM - filter on system attribute
FAT_FIL_LABEL - filter on label attribute
FAT_FIL_DIR - filter on directory attribute
FAT_FIL_ARCHIVE - filter on modified attribute
If you set mode to (FAT_INC_ACTIVE | FATATTR_READ_ONLY | FAT_FIL_RD_ONLY | FATATTR_ARCHIVE), the result will be the next active file that has its read-only attribute set (and has the archive attribute in either state).
NOTE: If you have FAT version 2.05 or earlier, you do not have access to the FAT_FIL_* macros.
To make things easier, there are two predefined mode flags. Each one may be used alone or in combination with the macros already described.
FAT_INC_ALL - selects any directory entry of any type.
FAT_INC_DEF - selects the next active file or directory entry, including read-only or archived files. No hidden, system, label, deleted, or empty directories or files will be selected. This is typically what you see when you do a directory listing on your PC.
Search Flag Examples
Here are some more examples of how the flags work.
If you want the next hidden file or directory:
Start with the FAT_INC_DEF macro default flag. This flag does not allow hidden files, so we need FATATTR_HIDDEN. Then to narrow the search to consider only a hidden file or directory, we need the macro FAT_FIL_HIDDEN to filter on files or directories that have the hidden attribute set. That is, mode is set to:
FAT_INC_DEF | FATATTR_HIDDEN | FAT_FIL_HIDDEN
If you want the next hidden directory:
Start with the FAT_INC_DEF macro default flag. To narrow the search to directories only, we want entries with their directory attribute set; therefore, OR the macros FATATTR_DIRECTORY and FAT_FIL_DIR. Then OR the macros FATATTR_HIDDEN and FAT_FIL_HIDDEN to search only for directories with their hidden attribute set. Set mode to:
FAT_INC_DEF | FATATTR_DIRECTORY | FAT_FIL_DIR | FATATTR_HIDDEN | FAT_FIL_HIDDEN
If you want the next hidden file (no directories):
Start with the predefined flag, FAT_INC_DEF. This flag allows directories, which we do not want, so we do an AND NOT of the FATATTR_DIRECTORY macro.
Next we want to narrow the search to only entries that have their hidden attribute set. The default flag does not allow hidden flags, so we need to OR the macros FATTR_HIDDEN and FAT_FIL_HIDDEN.
That is, set mode to:
FAT_INC_DEF & ~FATATTR_DIRECTORY | FATATTR_HIDDEN | FAT_FIL_HIDDEN
If you want the next non-hidden file (no directories):
First, select the FAT_INC_DEF filter default flag. This flag allows directories, which we do not want, so we do an AND NOT of the FATATTR_DIRECTORY macro. The default flag already does not allow hidden files, so we are done. That is, set mode to:
FAT_INC_DEF & ~FATATTR_DIRECTORY
Finally let’s see how to get the next non-empty entry of any type.
Start with the predefined flag, FAT_INC_ALL. This flag selects any directory entry of any type. Since we do not want empty entries, we have to remove that search condition from the flag, so we do an AND NOT for the FAT_INC_EMPTY macro to filter out the empty entries. That means mode is the bitwise combination of the macros:
mode = FAT_INC_ALL & ~FAT_INC_EMPTY
The fat_Delete() function is used to delete a file or directory. The second parameter sets whether a file or directory is being deleted. Only one file or directory may be deleted at any one time—this means that you must call fat_Delete() at least twice to delete a file and its associated directory (if the directory has no other files or subdirectories since a directory must be empty to be deleted).
|
fat_Delete(my_part, FAT_FILE, "DIR/FILE.TXT"); |
The first parameter, my_part, points to the static partition structure that was populated by fat_AutoMount(). The second parameter is the file type, FAT_FILE or FAT_DIR, depending on whether a file or a directory is to be deleted. The third parameter contains the file name, including the directory (if applicable) relative to the directory root. All paths in the FAT library are specified relative to the root directory.
Error Handling
Most routines in the FAT library return an int value error code indicating the status of the requested operation. Table 2 contains a list of error codes specific to the FAT file system. These codes, along with other error codes an application may encounter, are defined in \Lib\Rabbit4000\ERRNO.LIB.
The FAT file system stores and organizes files on a storage device such as a hard drive or a memory device.
Every file is stored on one or more clusters. A cluster is made up of a contiguous number of bytes called sectors and is the smallest unit of allocation for files. The Dynamic C FAT implementation supports a sector size of 512 bytes. Cluster sizes depend on the media. The table below gives the cluster sizes used for some of our RabbitCore modules.
|
RabbitCore Model |
Flash Device |
Number of Sectors per Cluster |
|
RCM 3700 |
1 MB Serial Flash |
1 |
|
RCM 3300 |
4 and 8 MB Serial Flash |
2 |
|
RCM3360/70 |
NAND Flash |
32 |
The cluster size for a NAND device corresponds to its page size. Note that a file or directory takes at minimum one cluster. On a NAND device the page size is 16K bytes; therefore, while it is allowable to write very small files to the FAT file system on a NAND device, it is not space efficient. Even the smallest file takes at least 16,000 bytes of storage. Cluster sizes for SD cards vary with the size of the card inserted. To determine the number of sectors per cluster on an SD card, divide the size of the card by 32MB.
The master boot record (MBR) is located on one or more sectors at the physical start of the device. Its basic structure is illustrated in Figure 3. The boot region of the MBR contains DOS boot loader code, which is written when the device is formatted (but is not otherwise used by the Dynamic C FAT file system). The partition table follows the boot region. It contains four 16-byte entries, which allows up to four partitions on the device. Partition table entries contain some critical information: the partition type (Dynamic C FAT recognizes partition types FAT12 and FAT16) and the partition’s starting and ending sector numbers. There is also a field denoting the total number of sectors in the partition. If this number is zero, the corresponding partition is empty and available.
Figure 3. High-Level View of an MBR

NOTE: Some devices are formatted without an MBR and, therefore, have no partition table. This configuration is not currently supported in the Dynamic C FAT file system.
The first sector of a valid FAT file system partition contains the BIOS parameter block (BPB); this is followed by the file allocation table (FAT), and then the root directory. The figure below shows a device with two FAT partitions.
Figure 4. Two FAT Partitions on a Device

The fields of the BPB contain information describing the partition:
the number of bytes per sector
the number of sectors per cluster (see Table 3)
the total count of sectors on the partition
the number of root directory entries
plus additional information not mentioned here
The FAT type (FAT12 or FAT16) is determined by the count of clusters on the partition. The “12” and “16” refer to the number of bits used to hold the cluster number. The FAT type is calculated using information found in the BPB. Information from a BPB on a mounted partition is stored in the partition structure (of type fat_part) populated by fat_AutoMount().
Partitions greater than or equal to 2 MB will be FAT16. Smaller partitions will be FAT12. To save code space, you can compile out support for either FAT type. Find the lines
#define FAT_FAT12 // comment out to disable FAT12 support
#define FAT_FAT16 // comment out to disable FAT16 support
in LIB/../FAT.LIB, make your change, and then recompile your application.
The file allocation table is the structure that gives the FAT file system its name. The FAT stores information about cluster assignments. A cluster is either assigned to a file, is available for use, or is marked as bad. A second copy of the FAT immediately follows the first.
The root directory has a predefined location and size. It has 512 entries of 32 bytes each. An entry in the root directory is either empty or contains a file or subdirectory name (in 8.3 format), file size, date and time of last revision and the starting cluster number for the file or subdirectory.
The data area takes up most of the partition. It contains file data and subdirectories. Note that the data area of a partition must, by convention, start at cluster 2.
FAT version 2.13 introduces FAT_Write_MBR.c, a utility that simplifies the creation of multiple partitions. (See Section 12.4.1.2 for information on running this utility.) It is distributed with FAT version 2.13. It is also compatible with FAT versions 2.01, 2.05 and 2.10. If you have one of these earlier versions of the FAT and would like a copy of FAT_Write_MBR.c, please contact Technical Support either by email to support@rabbitsemiconductor.com or by using the online form: www.rabbit.com/support/questionSubmit.shtml.
Without the use of FAT_Write_MBR.c, creating multiple FAT partitions on the flash device requires a little more effort than the default partitioning. If the flash device does not contain an MBR, i.e., the device is not formatted, both fat_Init() and fat_AutoMount() return an error code (-EUNFORMAT) indicating this fact. So the next task is to write the MBR to the device. This is done with a call to fat_FormatDevice(). Since we want more than one partition on the flash device, fat_FormatDevice() must be called with a mode parameter of zero.
Before calling fat_FormatDevice(), partition specific information must be set in the mbr_part entries for each partition you are creating. The following code shows possible information for partition 0 where MY_PARTITION_SIZE is equal to the size of the desired partition in bytes, 512 is the flash sector size, and dev points to the mbr_part structure.
|
memset(dev->part, 0, sizeof(mbr_part)); |
The memset() function is used to initialize the entry to zero. The values for starthead and endhead should be 0xFE to indicate that the media uses LBA (Logical Block Addressing) instead of head and cylinder addressing. The FAT library uses LBA internally. The values for the startsector, partsecsize and parttype fields determine where the partition starts, how many sectors it contains and what partition type it is. The number of sectors in the partition is calculated by dividing the number of raw bytes in the partition by the sector size of the flash. The number of raw bytes in the partition includes not only bytes for file storage, but also the space needed by the BPB and the root directory. One is added to dev->partsecsize to ensure an extra sector is assigned if MY_PARTITION_SIZE is not evenly divisible by the size of a flash sector. The partition type (.parttype) is determined by the partition size: 1 indicates FAT12 and 6 indicates FAT16. Fill in an mbr_part structure for each partition you are creating. The remaining entries should be zeroed out.
When laying out partitions, there are three basic checks to make sure the partitions fit in the available device space and do not overlap.
No partition can start on a sector less than 1.
Each partition resides on sectors from startsector throughstartsector+partsecsize-1. No other partition can have a startsector value within that range.
No partition ending sector (startsector+partsecsize-1) can be greater than or equal to the total sectors on the device.
The partition boundaries are validated in the call to fat_FormatDevice() and the function will return an error if any of the partition boundaries are invalid. If fat_FormatDevice() returns success, then call fat_AutoMount() with flags of FDDF_COND_PART_FORMAT | FDDF_MOUNT_DEV_# | FDDF_MOUNT_PART_ALL; where # is the device number for the device being partitioned. This will format and mount the newly created partitions.
File and directory names are limited to 8 characters followed by an optional period (.) and an extension of up to 3 characters. The characters may be any combination of letters, digits, or characters with code point values greater than 127. The following special characters are also allowed:
$ % ' - _ @ ~ ` ! ( ) { } ^ # &
File names passed to the file system are always converted to upper case; the original case value is lost.
The maximum size of a directory is limited by the available space. It is recommended that no more than ten layers of directories be used with the Dynamic C FAT file system.
Versions of the FAT file system prior to version 2.10 are compatible with µC/OS-II only if FAT API calls are confined to one µC/OS-II task. To make the FAT API reentrant from multiple tasks, you must do the following:
Use FAT version 2.10
#define FAT_USE_UCOS_MUTEX before #use'ing FAT.LIB
Call the function fat_InitUCOSMutex(priority) after calling OSInit() and before calling FAT APIs or beginning multitasking; the parameter “priority” MUST be a higher priority than all tasks using FAT APIs
Call only high-level fat APIs with names that begin with “fat_”
See the function description for fat_InitUCOSMutex() for more details, and the sample program Samples/FileSystem/FAT_UCOS.C for a demonstration of using FAT with µC/OS-II.
There are two macros that need to be defined for the FAT to work with the SF1000 Serial Flash Expansion Board.
#define SF_SPI_DIVISOR 5
#define SF_SPI_INVERT_RX
Hot-swapping is currently supported on the RCM3365 and the RCM3375. FAT version 2.10 or later is required. Two sample programs are provided in Samples/FileSystem to demonstrate this feature: FAT_HOT_SWAP.C and FAT_HOT_SWAP_3365_75.C. The samples are mostly identical: they both test for a keyboard hit to determine if the user wants to hot-swap the xD card, but, in addition, the sample program FAT_HOT_SWAP_3365_75.C also checks for a switch press and indicates a ready-to-mount condition with an LED.
After unmounting the xD card call _fat_config_init(). This disconnects drive and device structures from internal tables to work around a potential problem swapping from smaller to larger removable devices.
As demonstrated in the sample programs, an xD card should only be removed after it has unmounted with fat_UnmountDevice() and no operations are happening on the device.
Only fat_AutoMount() should be used to remount xD cards. In addition, the function nf_XD_Detect() should be called to verify xD card presence before attempting to remount an xD card.
xD cards formatted with versions of the FAT prior to 2.10 did not have unique volume labels. If there is a chance that two such cards may be swapped, call fat_autoMount() with the FDDF_NO_RECOVERY flag set. This means that if there is a write cache entry to be written, it will not be written. The function fat_UnmountDevice() flushes the cache (i.e., writes all cache entries to the device) before unmounting, so this should not generally be a problem if the device was properly unmounted.
Hot-swapping is currently supported on the RCM3900 and the RCM3910. FAT version 2.14 or later is required. A sample program is provided in Samples/FileSystem to demonstrate this feature: FAT_HOT_SWAP_SD.C. The sample tests for a keyboard hit to determine if the user wants to hot-swap the SD card.
Hot-swapping an SD card requires that you unmount the device before removal, as the FAT filesystem employs a cache system that may not have written all information to the device unless unmounted.
As demonstrated in the sample program, the SD card should only be removed after it has unmounted with fat_UnmountDevice() and no operations are happening on the device. Only fat_AutoMount() should be used to remount SD cards. In addition, the function sdspi_debounce() should be called to verify SD card presence before attempting to remount an SD card.
At this time, the Dynamic C FAT file system does not support the following.
Single-volume drives (they do not have an MBR)
FAT32 or long file or directory names
Sector sizes other than 512 bytes
Direct parsing of relative paths
Direct support of a “working directory”
Drive letters (the FAT file system is not DOS)
There are a number of good references regarding FAT file systems available on the Internet. Any reasonable search engine will bring up many hits if you type in relevant terms, such as “FAT,” “file system,” “file allocation table,” or something along those lines. At the time of this writing, the following links provided useful information.
This link is to Microsoft’s “FAT32 File System Specification,” which is also applicable to FAT12 and FAT16.
www.microsoft.com/whdc/system/platform/firmware/fatgen.mspx
This article gives a brief history of FAT.
http://en.wikipedia.org/wiki/File_Allocation_Table
These tutorials give plenty of details plus links to more information:
www.pcguide.com/ref/hdd/file/fat.htm
www.serverwatch.com/tutorials/article.php/2239651
i. Be advised that FAT12 support will not be available in future Dynamic C versions. It is not recommended that you enable FAT12 support except to retrieve data before re-formatting partitions to FAT16. With FAT12 disabled, smaller partitions will be formatted as FAT16. With FAT12 enabled, small partitions formatted FAT16 are functional
ii. We use the terms directory and subdirectory somewhat interchangeably. The exception is the root directory—it is never called a subdirectory. Any directory below the root directory may be referred to as a directory or a subdirectory.
iii. Call fat_UnmountPartition() when using a FAT version prior to v2.06.