
| Products | |
| |
|
| • | device servers |
| • | terminal servers |
| • | console management |
| • | USB |
| • | async |
Installation Guide For
Acceleport Xe, Acceleport Xr, Acceleport Xem, Acceleport C/x, Acceleport Epc/x
ISA adapters in Windows 2000
**Make sure you have one of the above stated boards. All of the above boards have one bank of 4 dip switches. If your board has more banks of dip switches, see the PC/X and Classic ISA install instructions.**
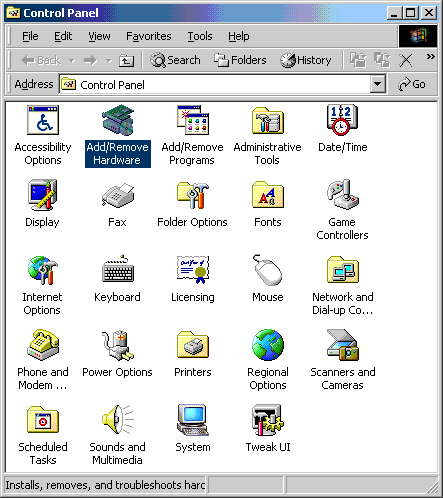
1. Open Start>Settings>Control Panel>Add New Hardware. Double click Add New Hardware.
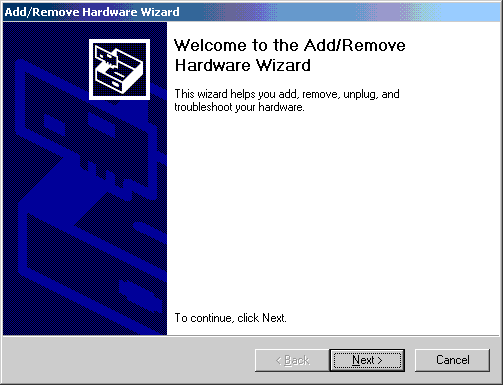
2. Click Next.
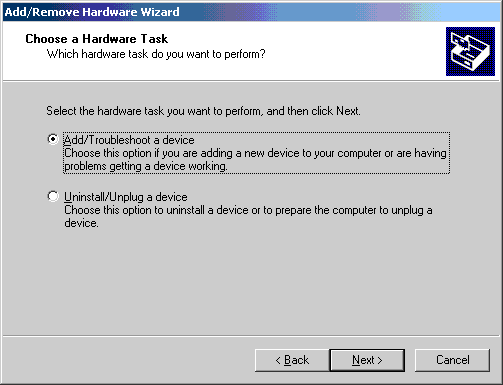
3. Select the "Add/Troubleshoot a device" radio button. Click Next.
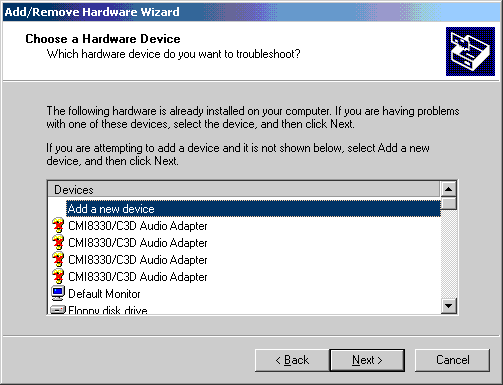
4. Windows 2000 will do a quick scan for PNP hardware, after it's done Select "Add a new device". Click Next.
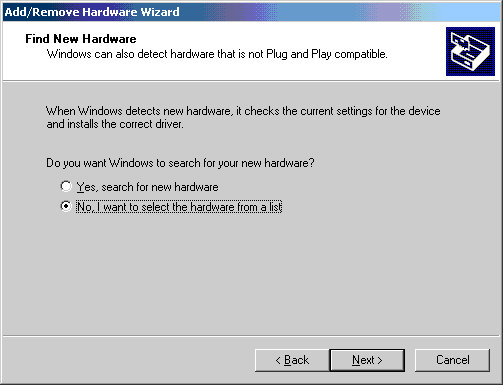
5. Click the "No, I want to select the hardware from a list" radio button. Click Next.
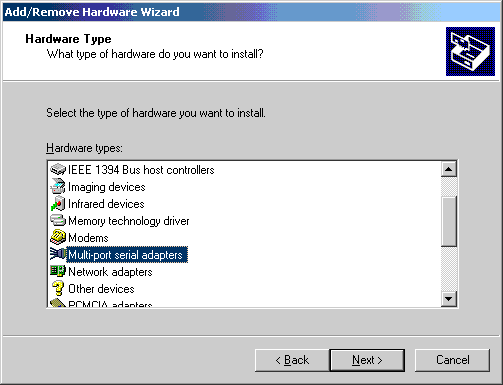
6. Select "Multi-port serial adapters". Click Next.
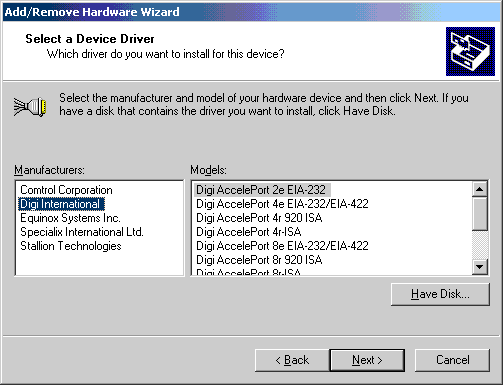
7. Select Manufacturers:"Digi International". Select your particular device. Click Next.
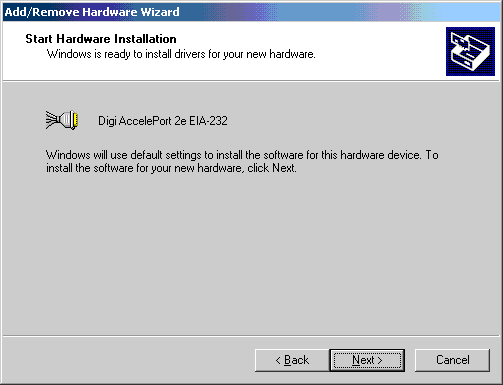
8. Click Next. On the Digital Signature not found window, select Yes.
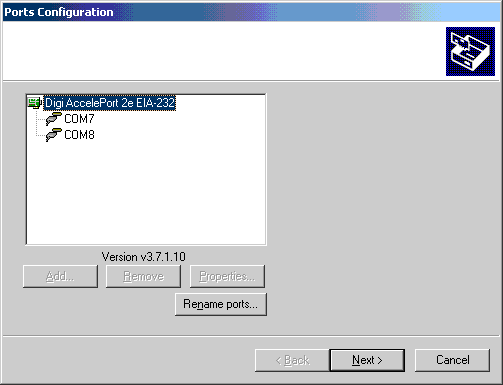
9. Now you should see the Ports Configuration box. Change things if you wish. Click Next.
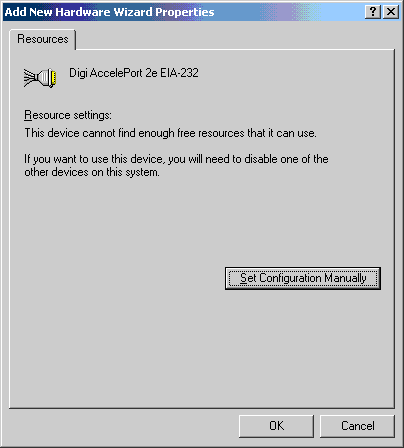
10. Your board is most likely not configured for the default resource configuration. Click on the Resources button to change them.
11. Click the Set Configuration Manually button.
12. Double click on Memory Range.
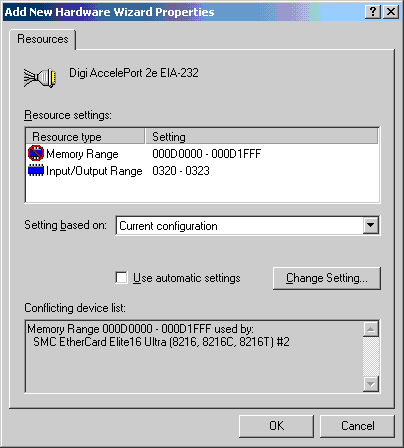
13. Select the memory address you wish to use. Most machines will require you to reserve a legacy ISA resource in your bios, see your motherboard manual for more info. Valid rages for most machines are from C8000-E8000. Click OK when finished editing.

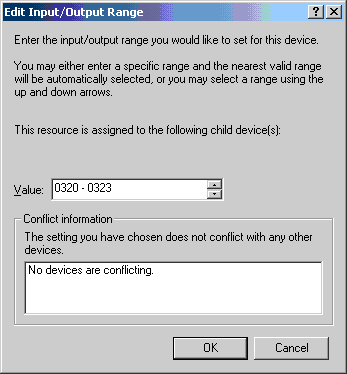
14. Double click on Input/Output Range.
15. This is where we set the IO address for your adapter. This is set PHYSICALLY on the card with dip switches, please double check and make sure the value matches the dip switches. Click OK when you're done editing.
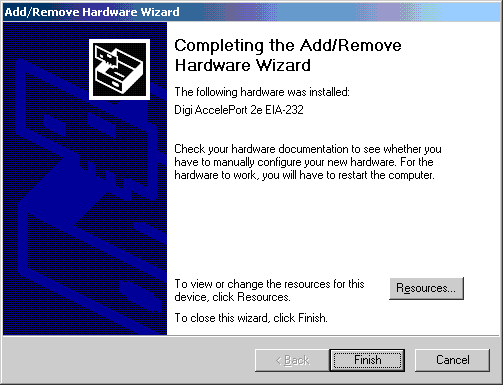
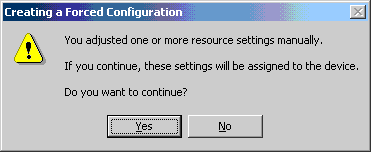
16. We are sure these are the correct resources. Click Yes.
17. Click Finish.

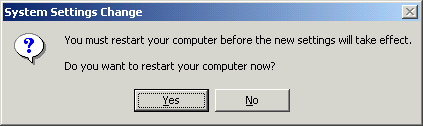
18. Unless you have more ISA adapters to install, Click Yes.
19. If the adapter name is NOT preceded by a yellow circle with an
"!" in it, the adapter should be ready to go.
If you do have a yellow circle with a
"!" in it, you may want to look at our troubleshooting
guide for further assistance.
(c) 2000 Digi International
Revised 3/14/2000: SB
