Digi EtherLite RealPort Firmware Upgrade
Prerequisite:
In order to successfully upgrade the firmware on the EtherLite, verify
the following before proceeding:
A. Your PC has a single NIC (Network Card). If so, temporarily disable the
other Network Cards.
B. You are not running DHCP. If so, give your PC a static IP Address and
segregate the PC and EtherLite on a dumb hub.
C. You are on the same subnet.
D. If you run Verlog.exe,
you are getting the EtherLite's MAC Address and IP Address response after power
cycling the EtherLite.
NOTE: Some switches and hubs do not pass BOOTP requests. If there
is any questions, we recommend using a dumb 10mb hub.
Procedure:
After verifying you are getting the proper response from the EtherLite
when running Verlog.exe, you may proceed with the following:
1. Run DgIpServ and select Store IP Settings (see Figure 1).
Click Next.
Figure 1
2. Locate the firmware file you downloaded and extracted.
Highlight it and
click Open (see Figure 2).
Figure 2
3. Enter the last 6 digits of the MAC Address. This will be on a
bar code sticker
located on the EtherLite (see Figure 3).
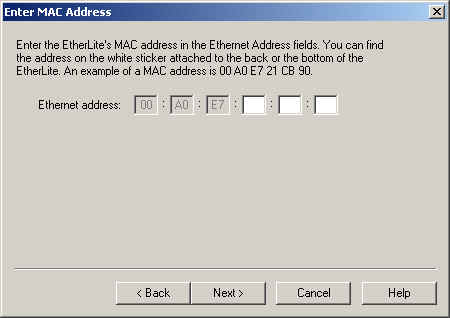
Figure 3
4. Enter the IP Address you want to assign to the EtherLite (see Figure
4).
Figure 4
5. Power cycle the EtherLite (see Figure 5).
NOTE: It is important when you power cycle the
EtherLite that you are giving it 10 seconds before resetting the power.
This
gives the EtherLite the time to properly shutdown.
Figure 5
5. After power cycling the EtherLite you will see the
following screen if the
firmware transfer is successful (see Figure 6).
Figure 6
6. You can rerun Verlog.exe to verify the version of the firmware has
now
been upgraded.