1. First, you will need to install TCP/IP Print services in Windows NT, as a network service.
2.
Under Network Services, click Add...to add a Service (see Figure 1).
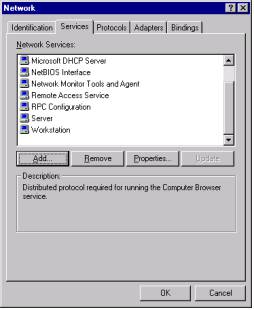
Figure 1
2. Select Microsoft TCP/IP Printing and click OK
(see Figure 2).
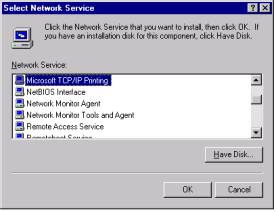
Figure 2
3. This will require you to insert the Windows NT Installation Disk.
4.
Allow the newly added service to bind and reboot
the Windows NT machine (see Figure 3).
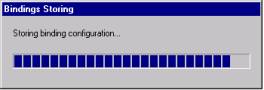
Figure 3
5. Next, you will be able to configure the LPR/LPD Printer.
6.
From the Start button, select Settings, and
Printers (see Figure 4).

Figure 4
7.
Double click on the icon to Add Printer (see Figure 5).
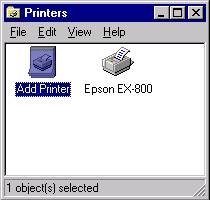
Figure 5
8.
In Add Printer Wizard select the radio button
next to My Computer, click Next (see Figure 6).
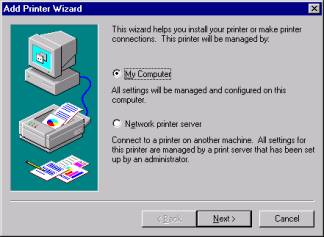
Figure 6
9.
In the Add Printer Wizard click on Add
Port...button (see Figure 7).
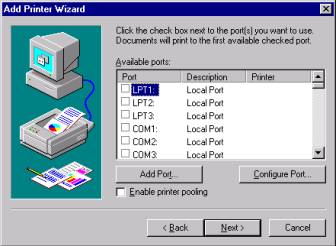
Figure 7
10.
From the Printer Ports option list select LPR
Port (see Figure 8)
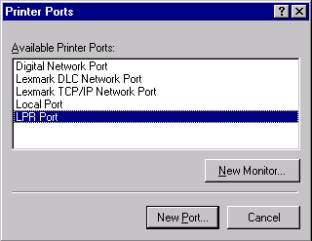
Figure 8
11. Enter the IP Address or DNS Name of the
PortServer II. Enter the Print Queue Name, as defined in the Command
Reference Manual
See Chapter 5 for further details and
examples (see Figure 9). Click Ok.

Figure 9
12. Select the newly created port from the list (see
Figure 10).
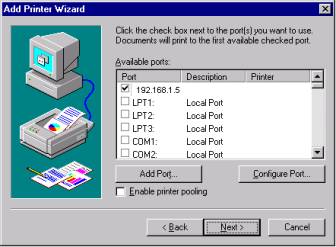
Figure 10
13.
Select the Manufacturer and Model of the Printer you are installing (see Figure
11). Click Next.
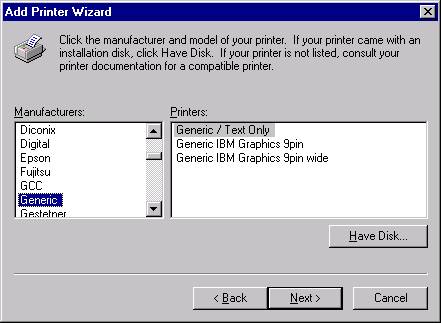
Figure 11
14.
Enter a name for the Printer and specify whether
this will be the default printer (see Figure 12). Click Next.
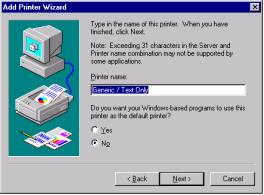
Figure 12
15.
You will now have the option to share the printer (see Figure
13). Click Next.
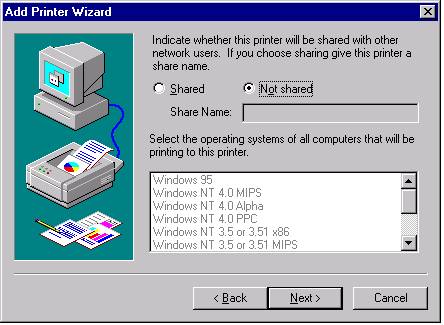
Figure 13
16.
Choose to print test page if desired, and click
Finish (see Figure 14).
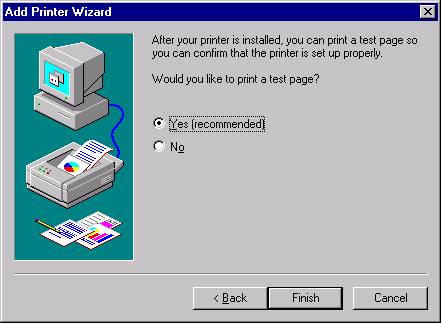
Figure 14